Showing posts with label valentine. Show all posts

Wednesday, January 23, 2013

Valentine's Day Class

You are invited to my Valentine's Day Class on Friday, January 25 at 7:00 pm. If you live in the Twin Cities area, contact me for more details. I would love to have you join us:) This  class is buffet-style in which you choose which projects and how many of each you would like to make. 

Fancy Favor Box with Felt Paper Clip Bookmark

Close-up of Felt Paperclip Bookmark

5x3 1/2 inch Card

Heart Smore

Red Starbursts in a Cello Bag

Wednesday, February 15, 2012

Inspired by Others


I wanted to get this card posted yesterday, but it didn't happen! There has just been too much going on. I CASED this card from Heather Summers. You can see her card here. My heart was made from inking the Dot, Dot, Dot stamp in Craft White and then embossing it using White Embossing Powder. The clouds were punched using the Cup Cake punch out of white cardstock that I dry embossed using the Square Lattice embossing folder. The heart is hung on the Baker's Twine with a small clothespin. I stamped the sentiment and thought this card could be used for an anniversary card instead of a Valentine's Day card. I liked this card so much that I also made it using Pool Party.
If you are thinking that I have been busy doing taxes, well, that has NOT been the case! I haven't even started, and my husband gave me Saturday as my deadline! I'm itching to make a few cards, but since I will be subbing the next two days and be gone the next two nights, stamping time will probably not happen. I briefly mentioned an upcoming class in a previous post, and that class is on hold for now. My next class will be coming in the beginning of March.  


Monday, February 6, 2012

Glimmer Valentine's Day Card


Are you ready for Valentine's Day? The kids have been working on their school Valentine's and decorating their boxes. This Valentine's Day card is clean and simple. The base is Red cardstock. I used by Big Shot to cut the "i" and "u" from the Silver Glimmer paper and the heart was punched out of Red Glimmer paper. The banner was made using the Petal Cone Die and I stamped on the black with Craft White ink. The brad is a retired, but I thought I needed something more:)

The sketch for this card can be found at Clean & Simple, FTL 175, and I'm also linking up to the challenge at Stampin' Royalty, SR#109.

Thanks for stopping!


Sunday, January 22, 2012

Valentine's Day Class Projects

My Valentine's Day Class will be on Thursday, January 26 at 7:00 pm and Sunday, January 29 at 1:30 pm.  If you are able to make it to one of these times, please email me to RSVP.  Everyone is welcome and feel free to bring friends!

Felt Heart Hair Binder Packaged

Hair Binder in Lily's Hair
The heart hair binder is made from die cutting felt and then hot gluing it together. It is attached to a ponytail binder.
Owl Pillow Boxes


Aren't these pillow boxes cute? They can be filled with candy or a small gift. Choose which color you would like to make! These owls were inspired by others I have seen online.

Fancy Favor Boxes
The Fancy Favor Boxes are made by die cutting the designer paper using the Big Shot. The heart is die cut using the heart from the Movers and Shapers Die. A transparent sheet is adhered over the heart opening to see the candy through it. These are easy to make and would be perfect for parties and weddings.


The hearts from the Candy Conversations stampe set were stamped in Cherry Cobbler and then punched out. The Hearts Adorning Accents folder was used to dry emboss hearts in the middle of the card. Cherry Cobbler Baker's Twine is tied around the card. 

Matchbook Closed

Matchbook Open
The matchbook was designed to hold an individual bag of candy. (Skittles were all we had in the house, but something with different packaging would match better!). The pig from Button Buddies was stamped in Melon Mambo and then a button was adhered for its nose. Melon Mambo Pom-pom Trim, which is available in the Clearance Rack, was adhered to the bottom. The inside holds the candy and the saying "hogs & kisses" was punched out with the word window punch and layered onto Certainly Celery cardstock punched from the Modern Label Punch.

Wednesday, January 18, 2012

XOXO


This is a very clean and simple card created for the challenge CCMC184 found here. I used Riding Hood Red as my base with a layer of Blushing Bride. The edgelit and adorning accent embossing folder was used on the bottom of the white cardstock. I die cut the X's and O's using the Timeless Type Junior Alphabet. Riding Hood Red pleated satin ribbon was added.

Thanks for stopping by! 

Friday, January 13, 2012

Candy Conversations


These two cards are exactly the same except for the edgelit that was used. The cards use the Candy Conversation stamp set inked in wisteria wonder, lucky limeade and calypso coral. Pool party cardstock was die cut using the framelits and an embossed layer of hearts from adorning accents embossing folders was adhered over the pool party framelit. Pool party baker's twine was used to make a bow.  I love all the new colors of the baker's twine.

Monday, January 2, 2012

CAS Card


Happy New Year!  Now that  Christmas is over, I'm thinking of Valentine's Day:)  This card is a very simple CAS card. I used the Hearts Embossing Folder from the Adorning Accents Embossing Folders found in the Occasions Mini Catalog. The hearts are from the Candy Conversations set in the mini catalog and were stamped in Calypso Coral ink and then punched out using the small heart punch. Calypso Coral baker's twine was used to tie a bow. 

Thanks for stopping!

Tuesday, January 11, 2011

Valentine's Candy Bouquet

Remember my sunflower "bouquet" with the sweet treat cups? I decided to make some Valentine bouquets as well with the sweet treat cups and Sweet Centers stamp set. I had some people interested in learning how to make these, so these will be a project that will be made at my Valentine's Day class.

This one has chocolate covered raisins as the center and red m&m's in the "vase". I noticed after I took this picture that some of my candy was missing from the vase....hmm, could it have been my kids (and to pinpoint it even more, Carter) sneaking some?!?


This one has red m&m's as the center and chocolate covered raisins in the bottom (and once again, there are some missing!)


This is the backside of the heart.

Monday, January 10, 2011

Valentine's

I saw this layout on a stamping blog and knew that I had to try it out. I actually made a set of cards with this layout for Noah's teacher and thought it would work with the By Definition stamp set, too. This is a card that will be made at my Valentine's Day class (date to be determined after I get the kids basketball schedules). If you click on this picture, you may be able to see the red heart better as it is punched out of the glitter red card stock that is in the Occasions mini catalog.

Friday, January 22, 2010

Valentine Matchbook Scrappin' Kit!


Would you like to make one of these? Get everything you need in this Scrappin' Kit to make one! For $5.00 (plus mailing charges if applicable), you will get all the pieces you need to complete this scrapbook. (scored cardstock, designer paper, heats, numbers, glassine envelopes) All you need is adhesive and then assemble your Matchbook Valentine Scrapbook. This would be great for husbands, grandparents, teachers or anyone that you want to give something a little more than a "regular" card. Please note, the size of this is 4 1/2 x 2 3/4 inches. To order this kit, please email me at karieklundstamps@gmail.com.

Valentine - Chocolate Class


Valentine - Chocolate Class Friday, January 29, 7:00-9:30 p.m.

Create Valentine projects and a card. Each project is easy to duplicate if you decide you want to make more for Valentine's Day on your own! You will make:
  • 2 sour cream containers filled with Hershey kisses

  • 1 clear cellophane bag filled with 4 peppermint patties or Dove chocolates that have been decorated using the scallop punch and heart punches

  • 1 m&m candy heart envelope holder

  • 1 scallop envelope with Ghirardelli chocolate
  • 1 card using the heart sweet treat cups that will be filled with m&m's
Class Fee: $12.00 or bring a friend who is not on my email list and the class fee is $18.00 for the two of you!

RSVP: Wednesday, January 27

Place: my home (northern Twin Cities)

Friday, January 15, 2010

Perfect Polka Dots


This card is a CASE, but I do not have the site for the original designer. The card is made using the new perfect polka dots impressions folder for the Big Shot on the left hand side to dry emboss. The main panel was raised with dimensionals and uses sending love specialty paper and the eyelet border punch. Vanilla taffeta ribbon is tied around the panel and a button from the playground designer button pack was added and a bow was tied with linen thread (I love linen thread and use it A LOT). Love you much was stamped in real red ink. This stamp is a clear mount stamp...so far, I'm still liking the clear mount.

Thursday, January 14, 2010

Sour Cream Containers


These are not a new idea, but this is the first time I have made these "sour cream" containers. They are so simple to make! I cut the sending love specialty paper to 4x4 (you can cut your paper bigger if you want larger containers) and then adhered sticky tape to one end to make it into a tube. Then, use sticky tape and tape one of the ends closed and then paper crimp. Fill your sour cream container with treats and then seal the top the same way as the bottom. Punch a whole in the top and add a tag. I used the scallop punch and once again the heart to heart punch and tied the tag on using taffeta ribbon. An alternative to designer paper is to use vellum or clear transparency paper. These would be great for valentine's treats or party favors. We will be making these at my Valentine's Day Class:)

Wednesday, January 13, 2010

Another Valentine's Card

It may seem hard to believe with my past posts, but I'm really not a "heart" person! However, I seem to be using them a lot lately and liking them on the cards:)

This card uses the heart to heart punch and the sending love specialty paper. I raised each of the hearts with dimensionals, added a button (retired pink pirouette), and then paper piereced to the sentiment. The bottom of the card is punched with the eyelet border punch and I added some designer paper at the bottom of the card. Once again, a simple, clean and easy card.

Tuesday, January 12, 2010

Valentine's Card

After playing more with the sending love speciality paper, I still love it. You will see some more samples using this gorgeous paper! This card is a very simple and clean card. The three hearts were punched using the heart to heart punch and then raised with dimensionals. The bottom of the pretty in pink card stock was punched with the eyelet border punch. I added chocolate chip taffeta ribbon and a red button from the playground pack of designer buttons.

I will have more posts the next few days, so be sure to check back! I'm planning a Valentine's/Chocolate stamp class, so be watching your email if you are on my email list or this blog for more details.

Wednesday, January 6, 2010

New Stamps!


A new stamp set and some new paper has arrived! and I had a chance to make one card. The card below was inspired by a card on this blog. I used the new Sending Love Specialty designer paper that is in the new occasions mini catalog. This paper is delicious! It has glitter on one side of each of the pages. It makes the card pop without having to do much work:) The square blocks were punched using the 1 1/4 inch square punch and the heart was punched out of the paper using the large heart punch. The saying "love you much" is from the set Well Scripted which is also featured in the occasions mini catalog. I ordered this set in the clear mount option. Yes, SU is now offering sets with the clear mount option. Don't be confused, though, the rubber is not transparent, it is the exact rubber that is used for the wood mount stamps. At first I was a little bummed, because I thought it would be great to be able to actually "see" exactly where you were stamping. However, I LOVE these unmounted stamps. They stamp GREAT, just like the wood mount and I think it is easier to line up your image. I have stamped with some clear mount stamps before and have had a hard time getting a good image...not so with these. I think I may order all my new stamps sets in the clear mount option for two reasons: 1-it is easier to see where you are stamping and 2- space!!! those of you that have been to my place know that space is limited for me, and these take up less space. You'll have to try these stamps for yourself and let me know what you think.


Monday, February 16, 2009

Candy Cone

I love this project! It is so easy and cute. I used the big scallop die with my big shot to cut the scallop circle and then adhered the sides with sticky tape, put some candy in a small cellophane bag and added the tag with using the Yummy stamp set (a sale-a-bration set).

Supplies
Stamp Sets: Yummy
Cardstock: Chocolate Chip, Whisper White, Always Designer Paper
Ink: Regal Rose & Chocolate Chip Markers
Accessories: oval punches, cellophane bag, pink pirouette ribbon, Scallop Die, Big Shot

Monday, February 9, 2009

Valentine Treats


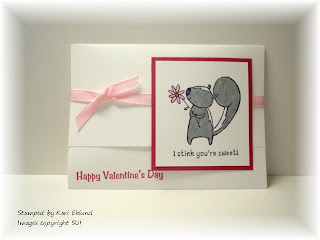
My daughter made these valentine treat wraps for the kids in her first grade class. "You're a blast" is for the boys and "I stink you're sweet" is for the girls.
Supplies
Stamps: Pun Fun, Holidays & Wishes
Cardstock: Whisper White, Rose Red, Only Orange
Ink: Basic Black, Rose Red, Green Galore
Accessories: Stampin' Write Markers, Grosgrain, Slit Punch

Saturday, February 7, 2009

Always Valentine

I love the colors in this card! The heart has some dazzling diamonds on it that make it sparkle!

Supplies
Stamp Sets: Always
Cardstock: Riding Hood Red, Kiwi Kiss, Chocolate Chip, Very Vanilla, Kraft
Ink: Very Vanilla, Chocolate Chip
Accessories: Alpine Ribbon, Dimensionals

Thursday, February 5, 2009

Valentine Hershey Nugget Holders


This is a very simple and cute project using the tag punches. The stamp set I used is a retired one. These would make great favors for any occasion by just changing up the image stamped.